本文教程参考官方文档:https://code.visualstudio.com/docs/cpp/config-mingw
安装 Visual Studio Code
Visual Studio Code 下载地址:https://code.visualstudio.com/download
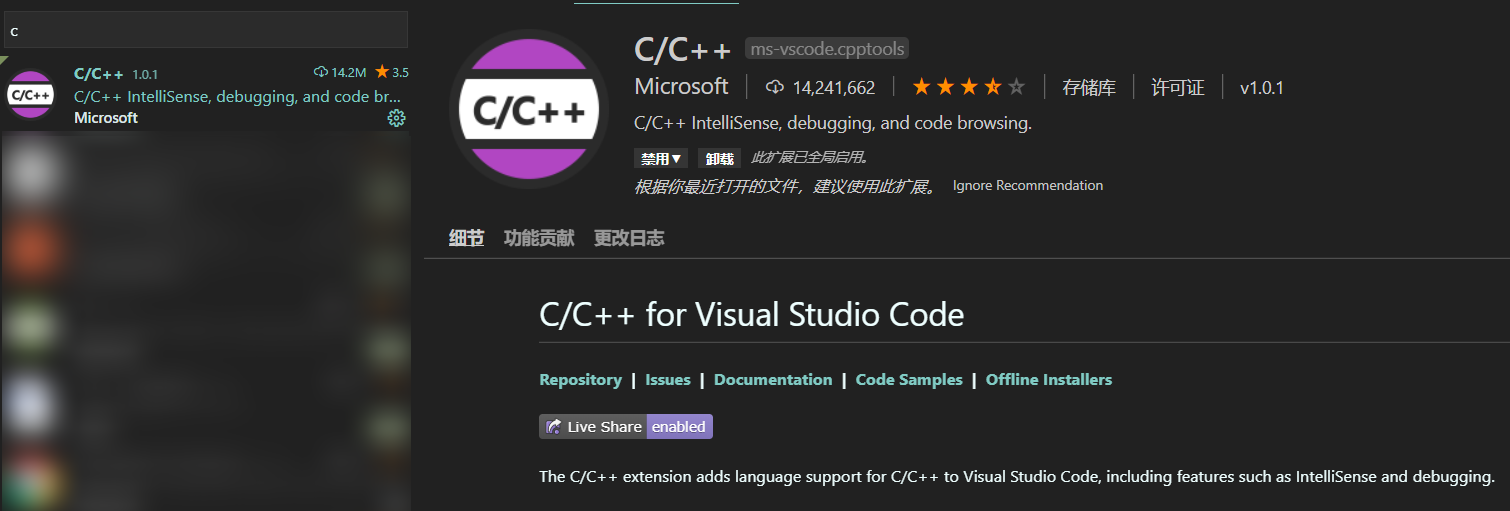
安装插件:C/C++
安装插件:C/C++ Extension Pack

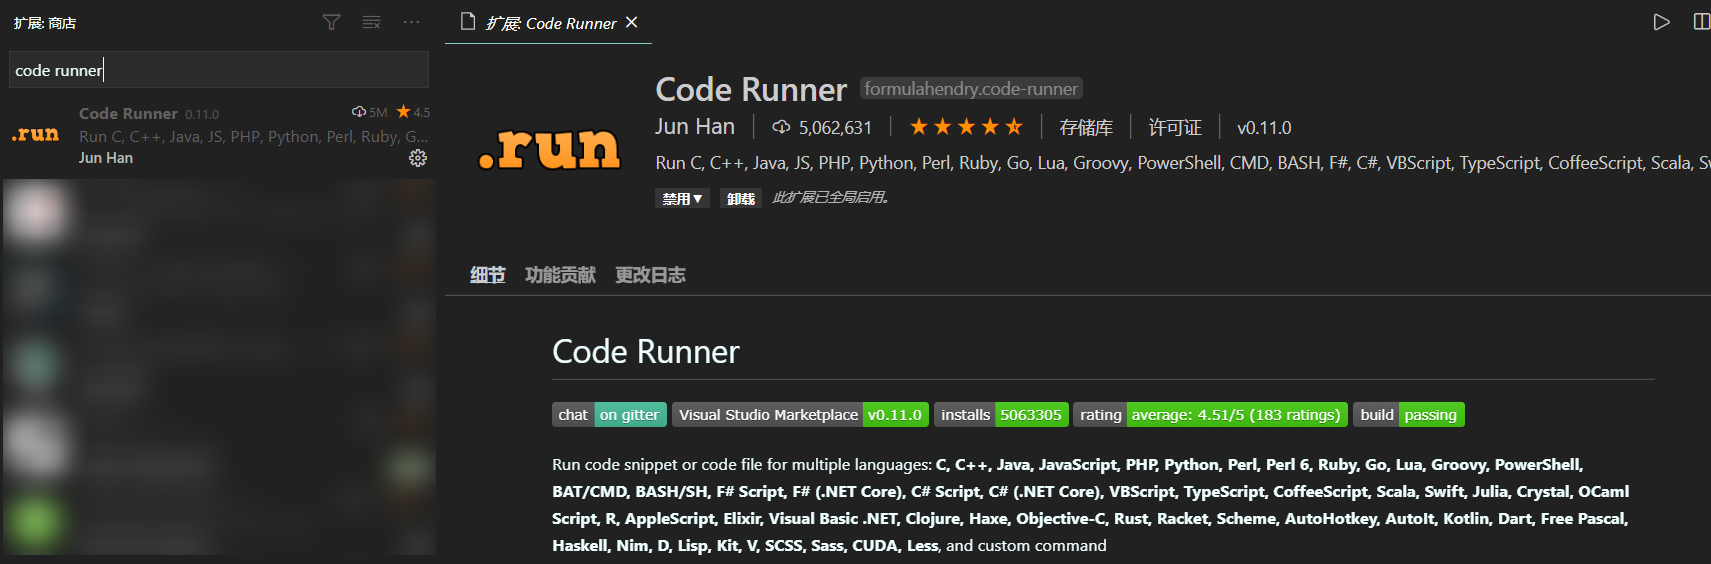
安装插件:Code Runner
安装 Mingw-w64
MinGW-w64 下载地址:https://sourceforge.net/projects/mingw-w64/files/
可以下载在线安装器:MinGW-W64-install.exe,笔者下载的是完整版,省得在线安装缓慢。
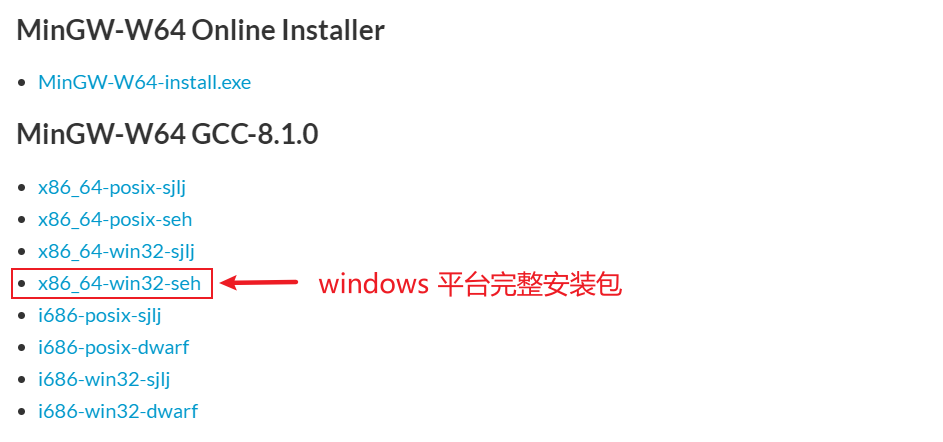
下载好的安装包名为:x86_64-8.1.0-release-win32-seh-rt_v6-rev0.7z,使用 7-Zip 解压缩工具解压该安装包。进入解压后的文件目录,里面 mingw64 文件目录,将其剪切到指定的不含空格及中文目录下。
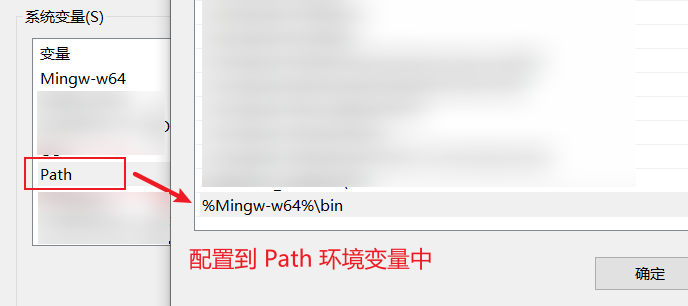
配置系统环境变量:Mingw-w64

将创建好的环境变量配置到 Path 中:%Mingw-w64%\bin
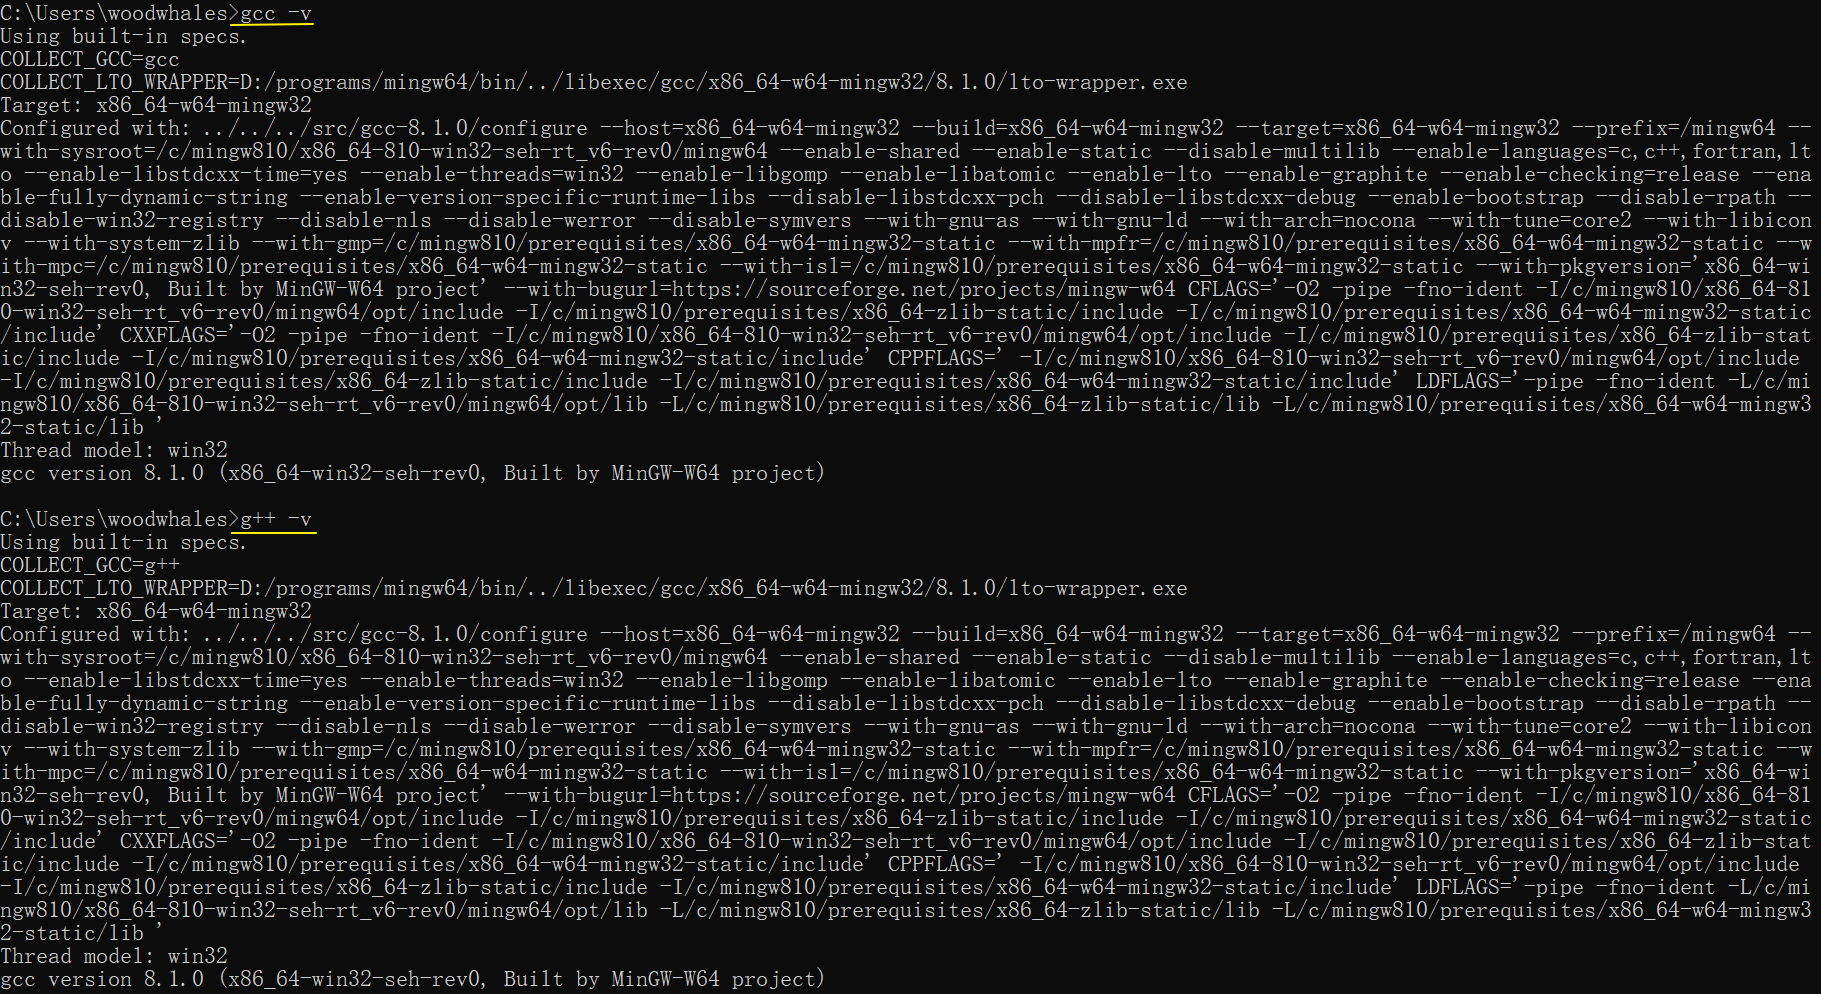
配置好 Mingw-w64 系统环境变量之后,打开 cmd 或者 windows terminal 终端窗口,执行如下命令可可以查看 gcc/g++ 编译器版本:
1 | gcc -v |
出现版本信息则表示 Mingw-w64 安装成功:
Visual Studio Code 常用设置
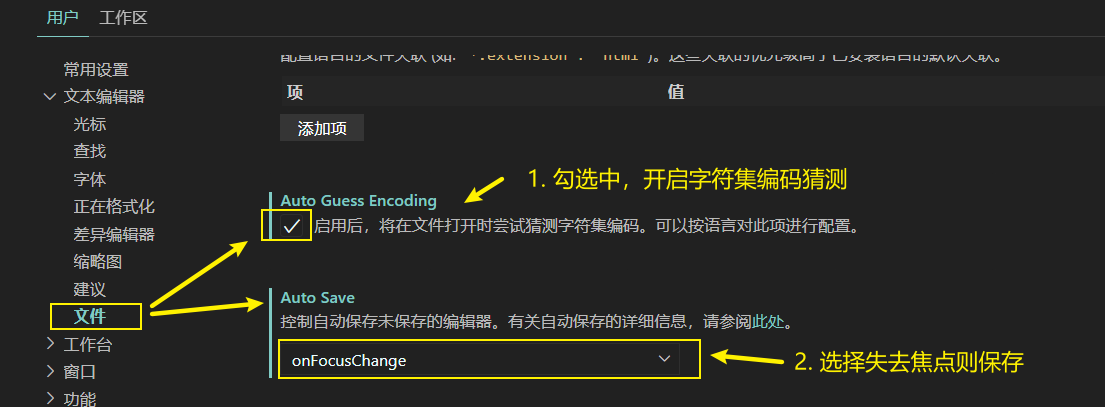
Visual Studio Code 设置自动保存
在设置中,找到文件,设置失去焦点自动保存:
Code Runner 插件配置
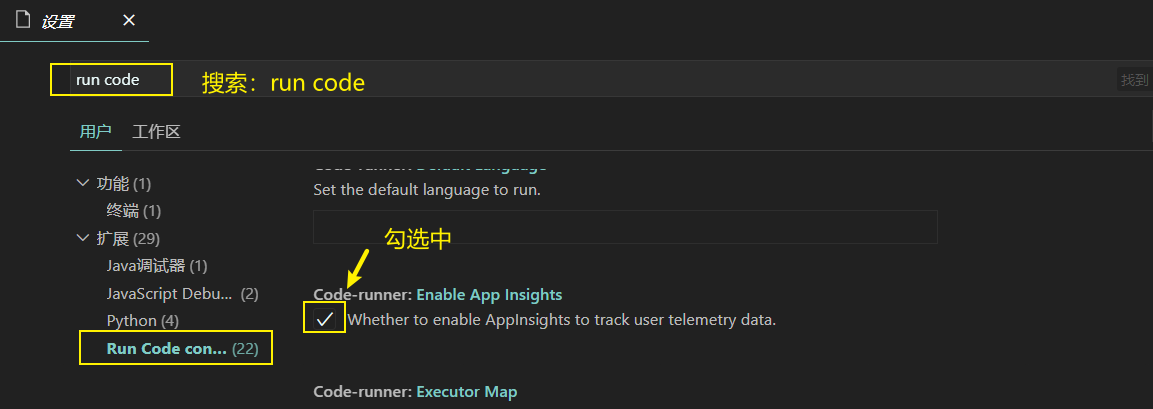
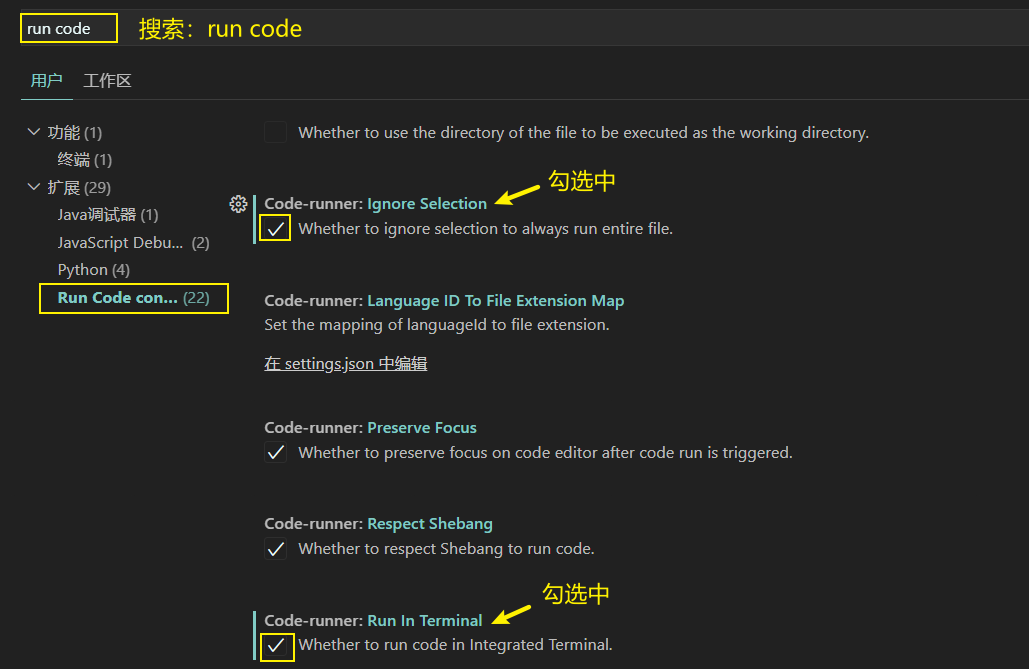
防止运行 code runner 插件时,出现:vscode 中出现无法在只读编辑器中编辑问题,设置如下:
解决中文乱码问题:
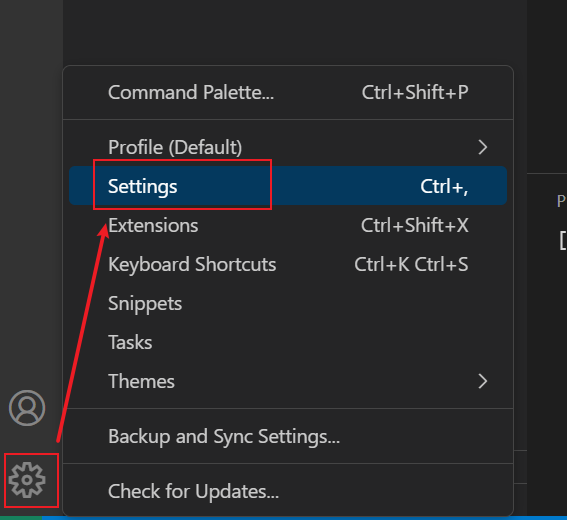
步骤1:点击 vsCode 设置:
步骤2:搜索 code-runner 扩展设置,找到 Executor Map配置:
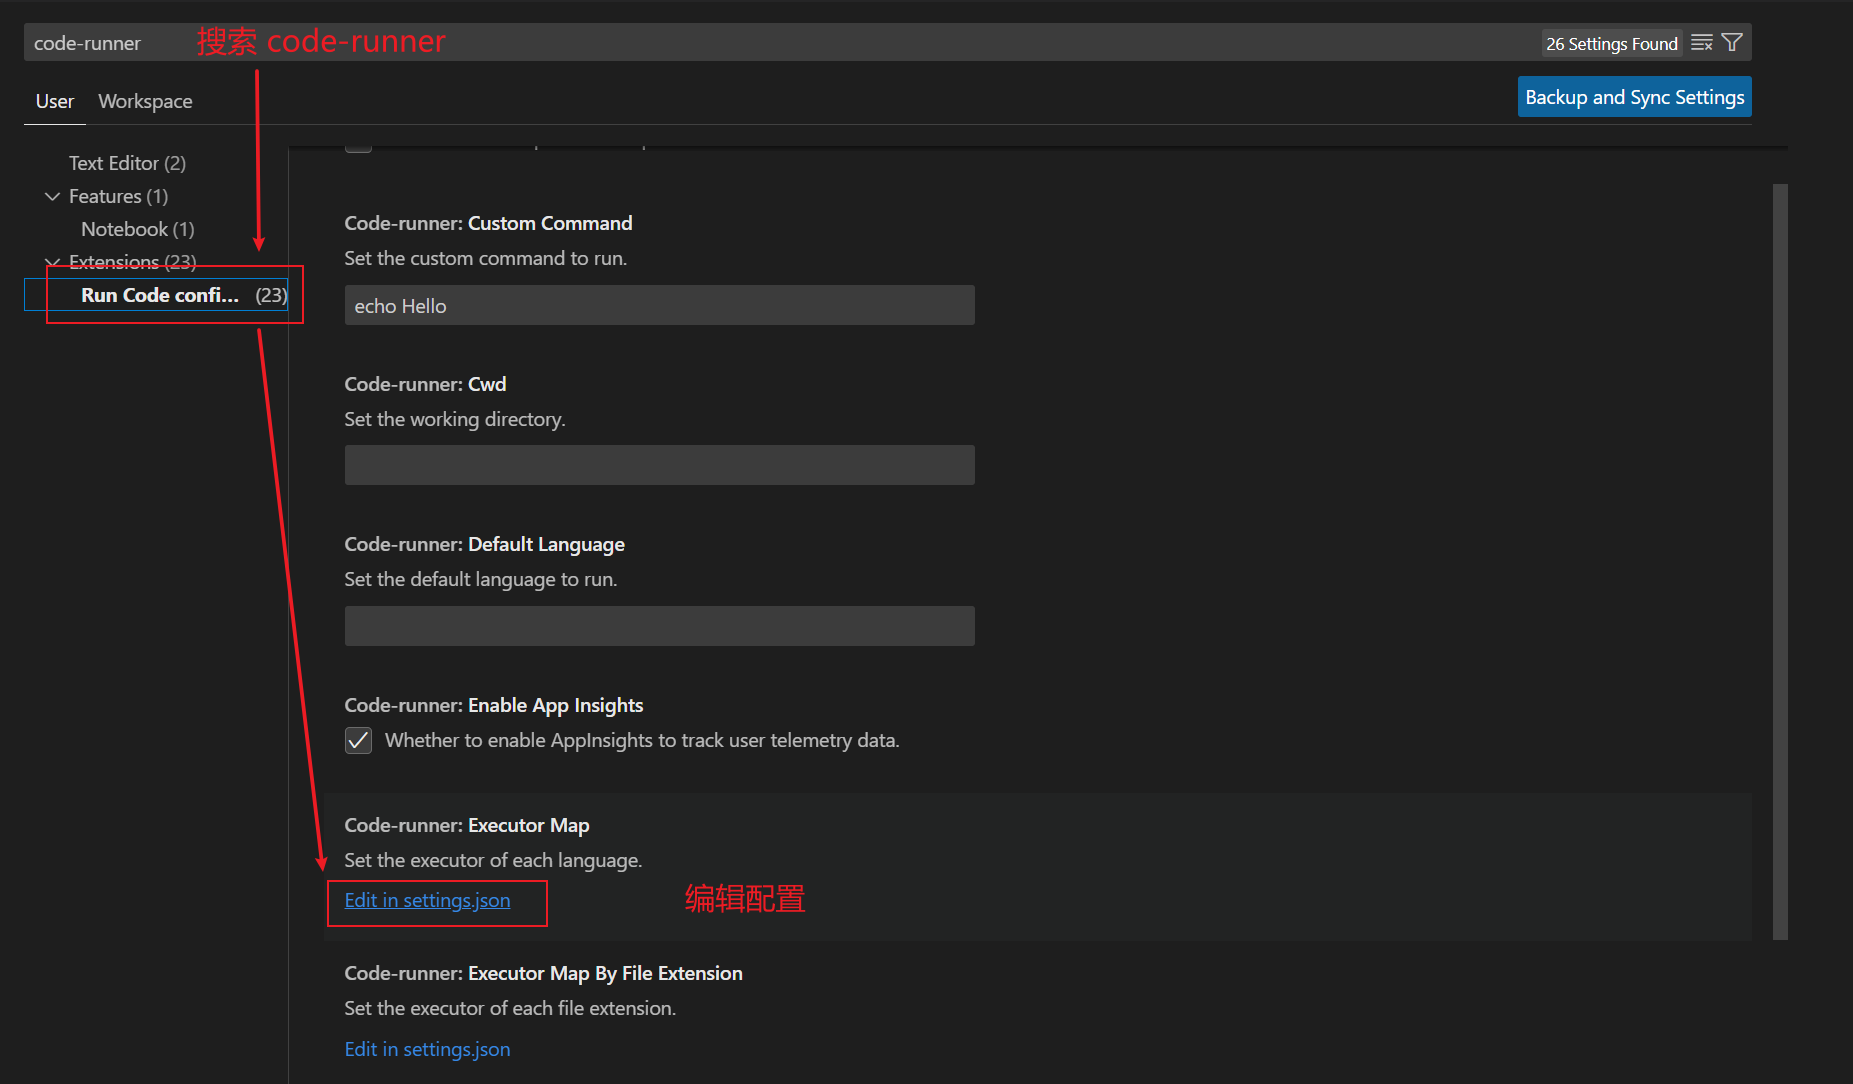
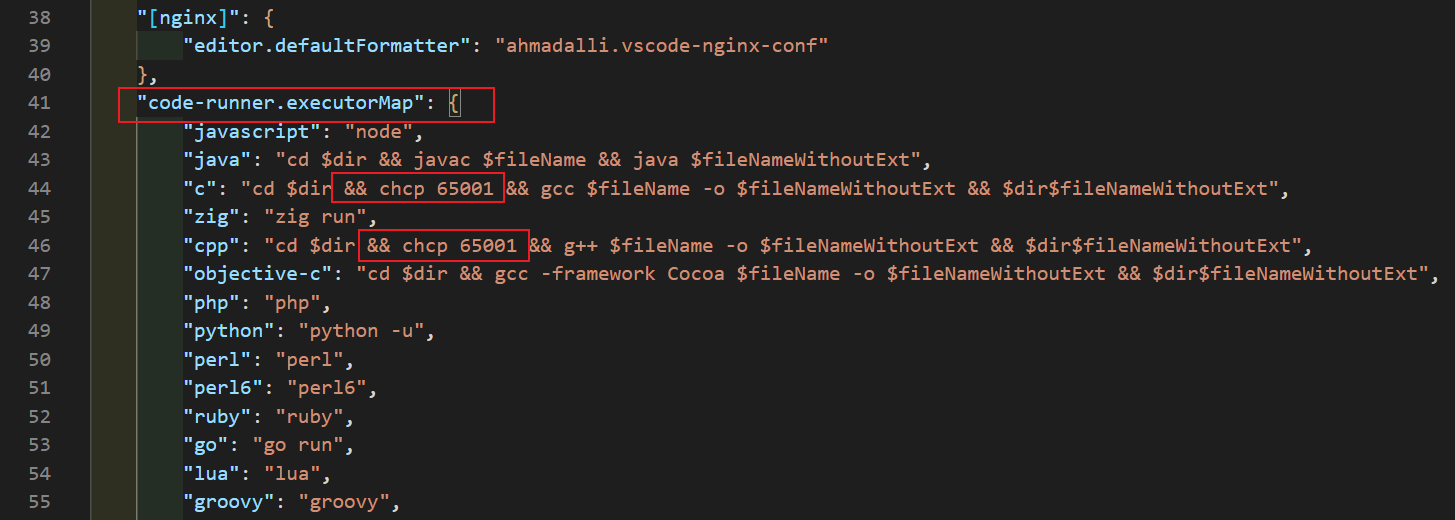
步骤3:在code-runner.executorMap配置项中对 C、C++ 添加&& chcp 65001参数:
C/C++ 插件配置
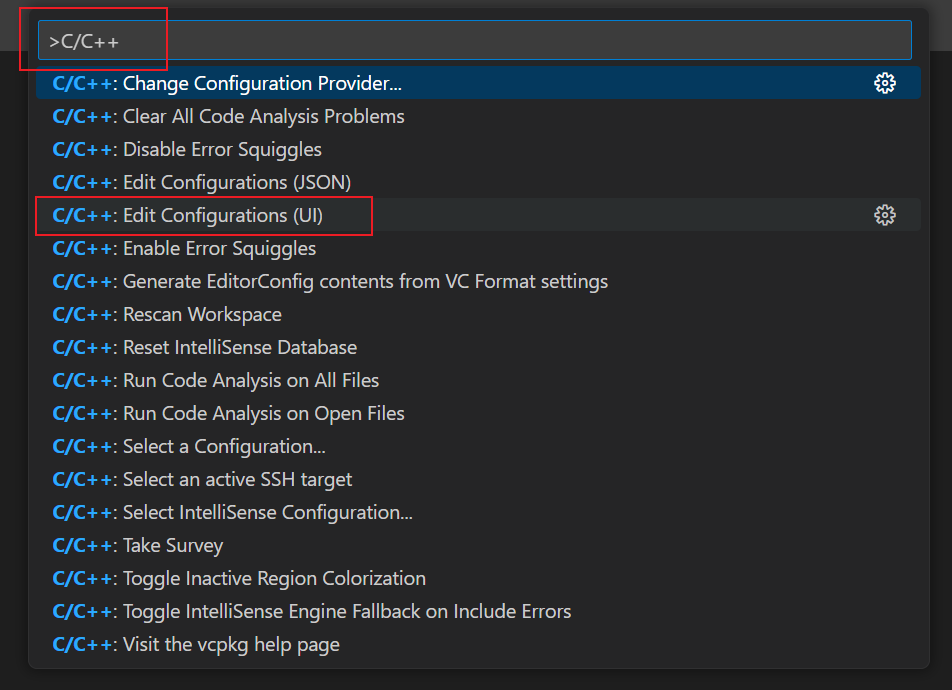
按下Ctrl + Shift + P键位,输入c/c++,选择:C/C++:Edit Configurations(UI)
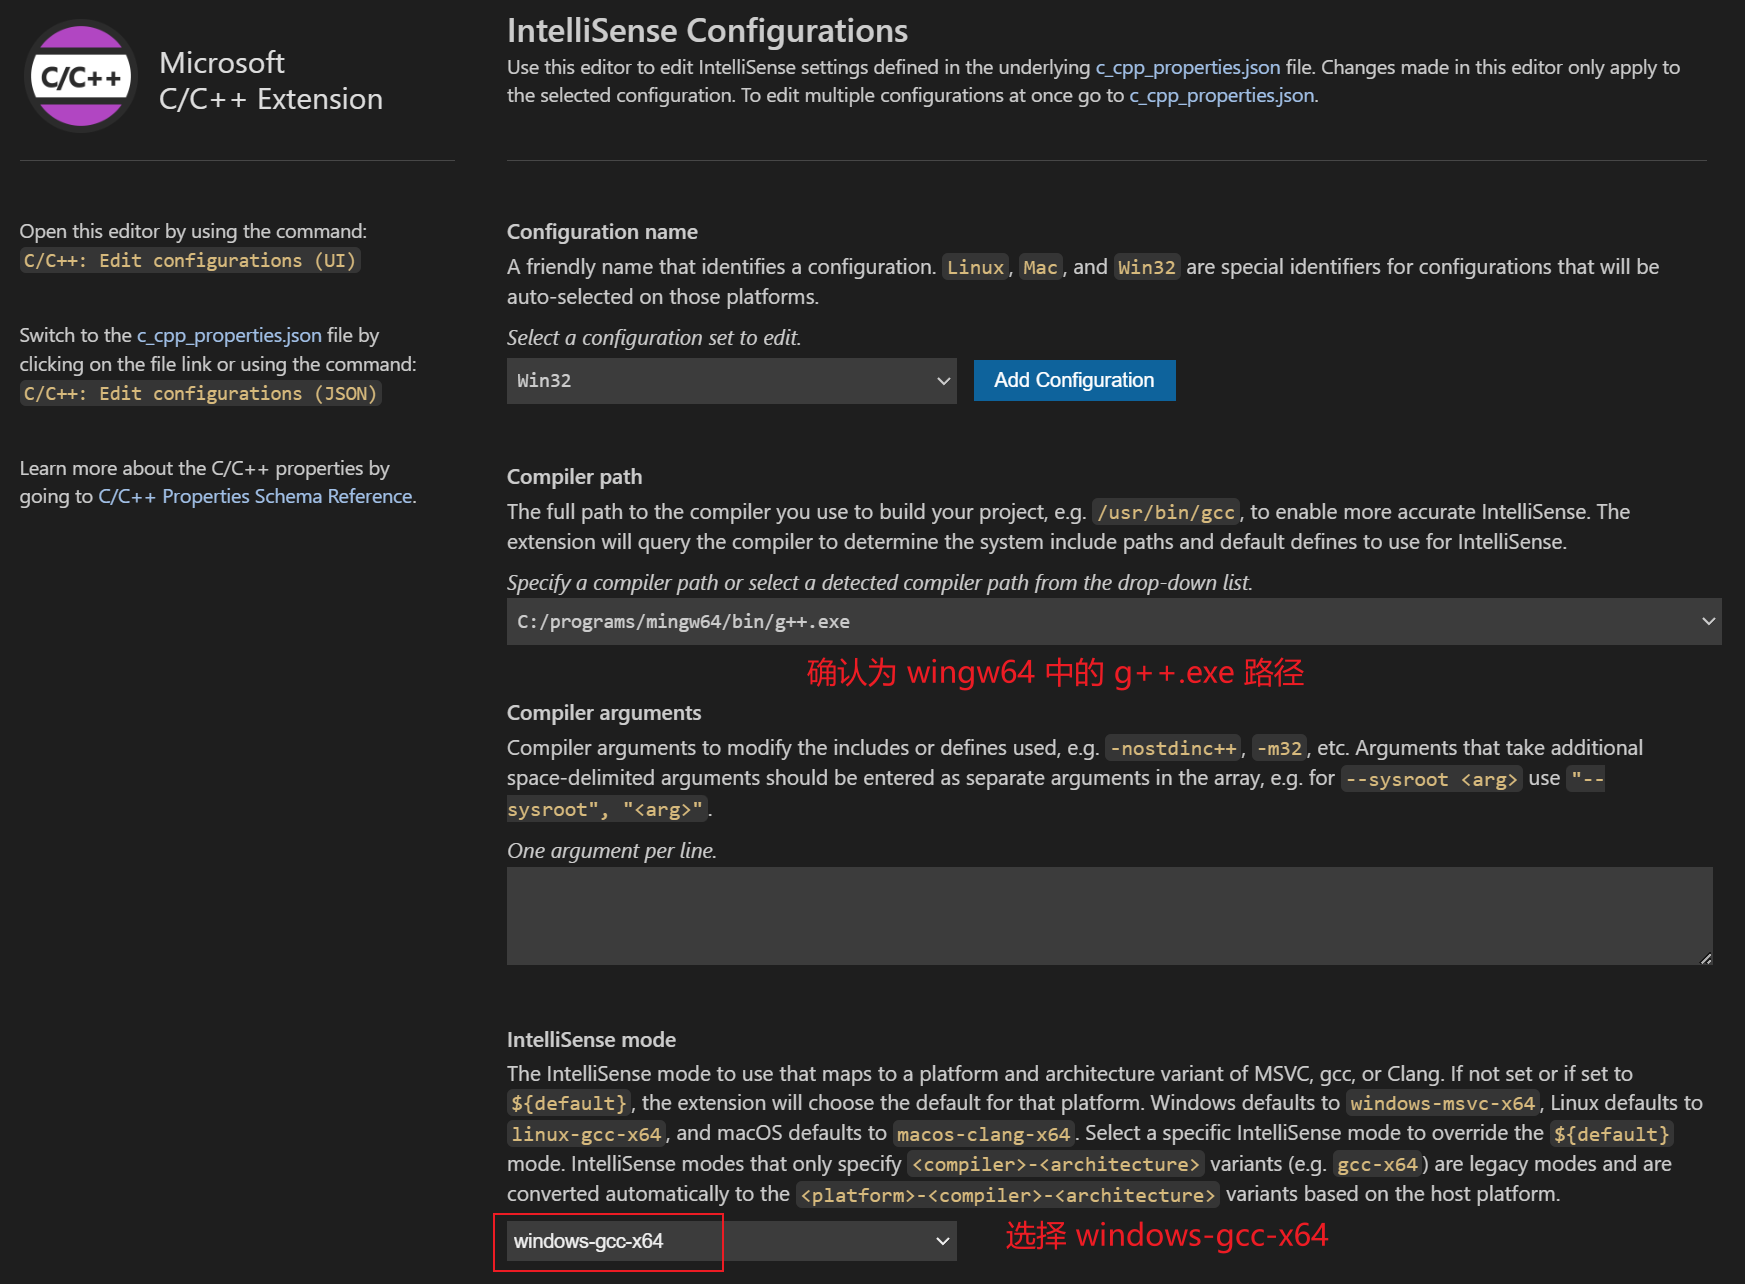
更改编译器路径和 IntelliSense 模式:
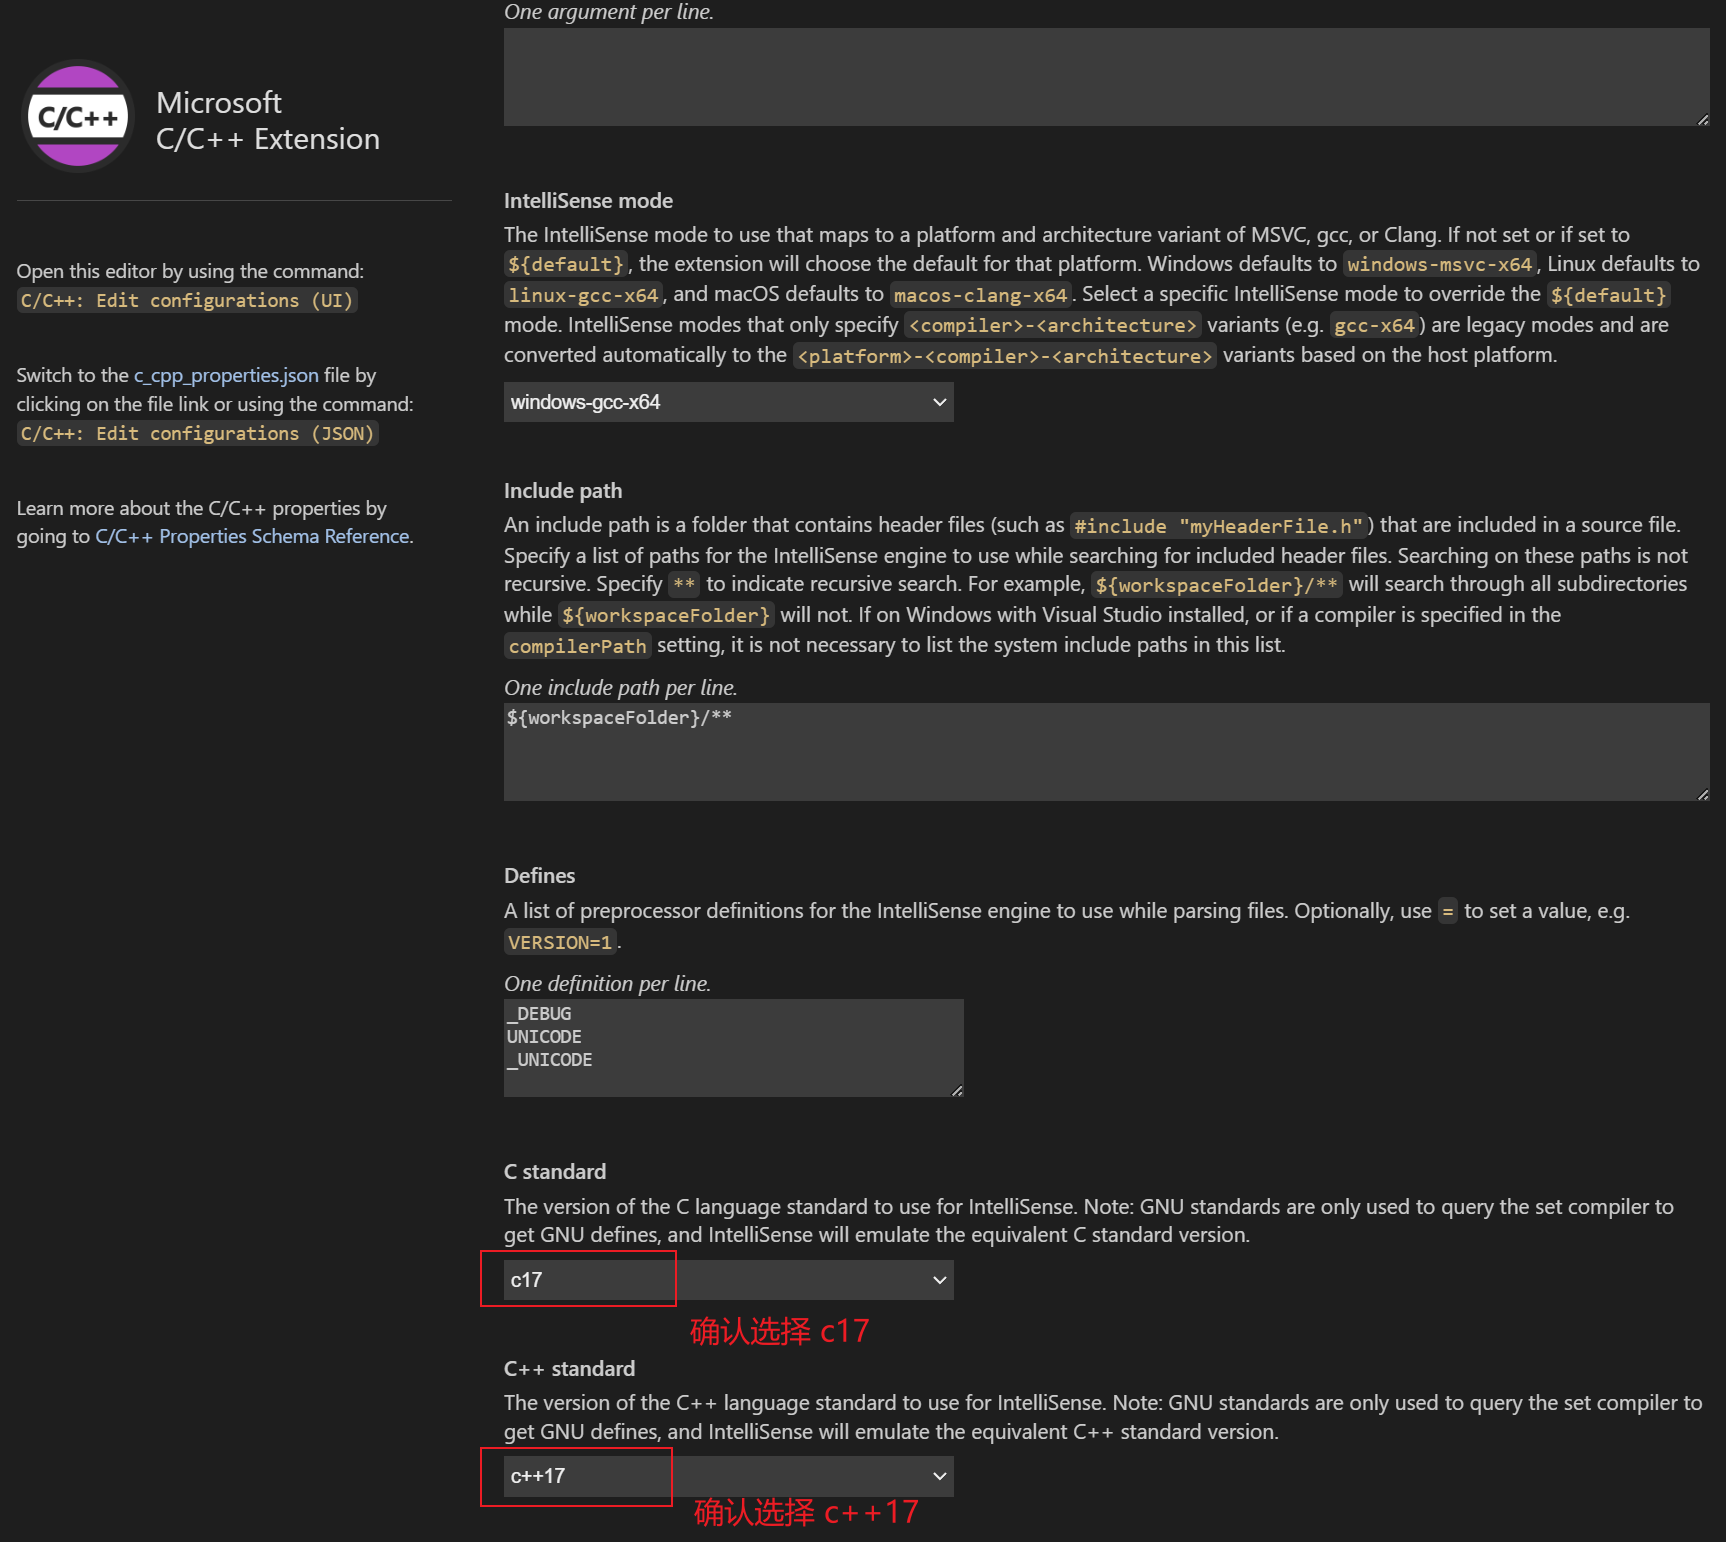
下滑设置 c、c++ 的标准:
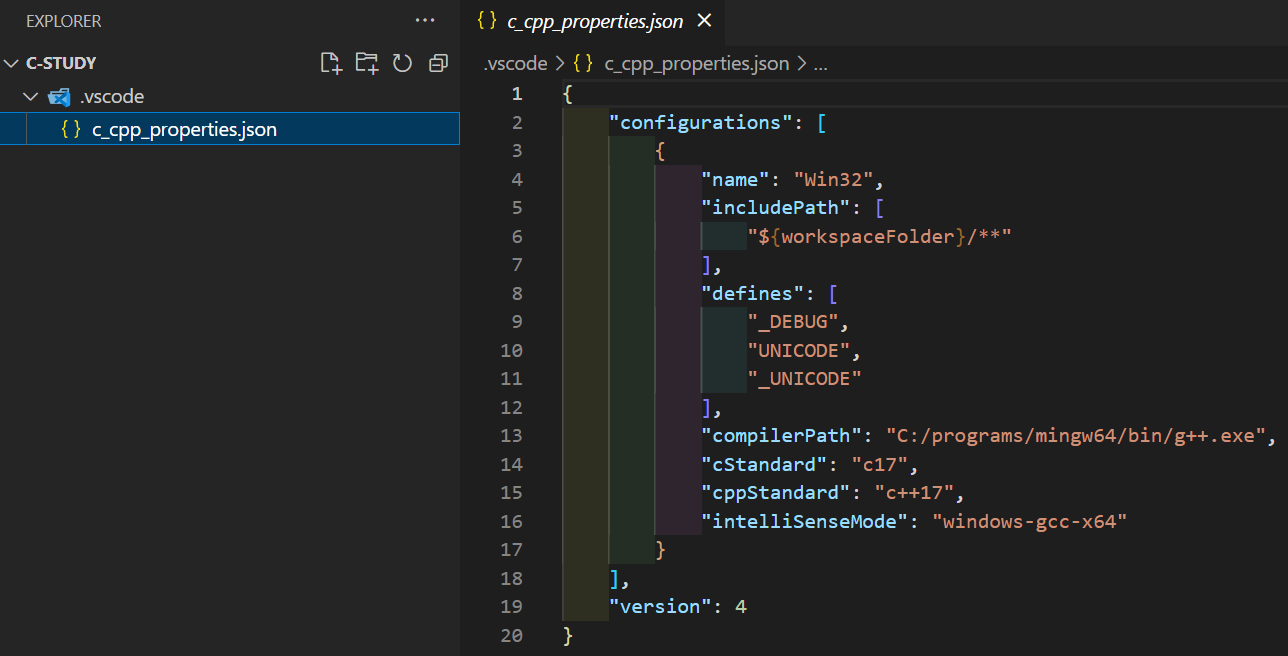
设置完成后,我们可以看到,在.vscode文件夹下自动生成了c_cpp_properties.json文件:
运行 C 文件
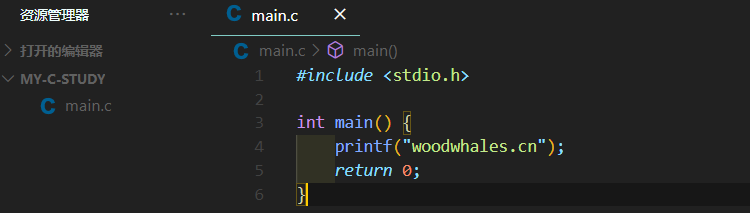
步骤1:使用 vsCode 创建一个 mian.c 文件:
1 |
|
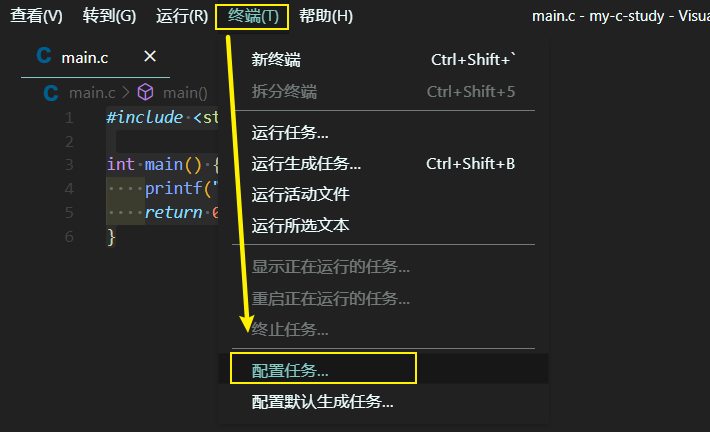
步骤2:创建配置任务文件:在 “Terminal” 菜单中选择 “配置任务”
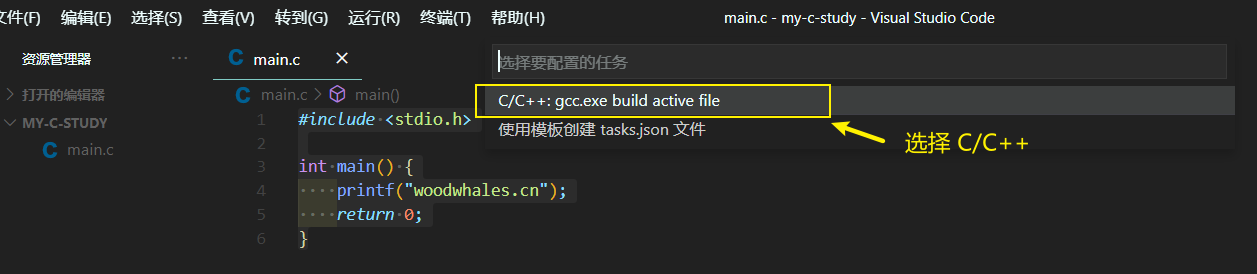
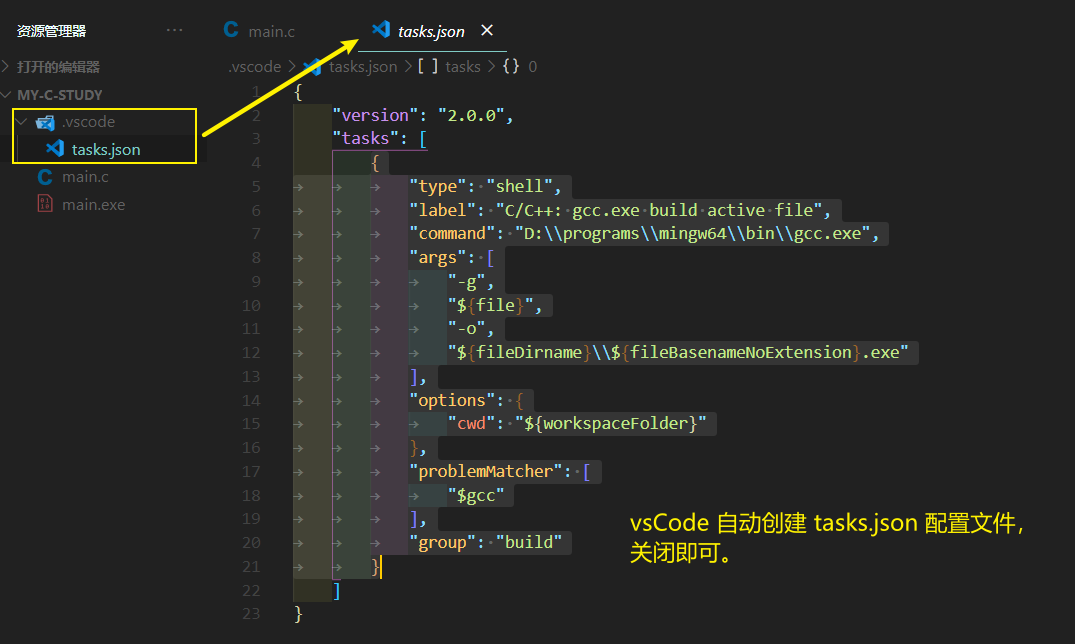
点击 “C/C++”,vsCode 自动生成配置文件:
步骤3:执行 C 文件:
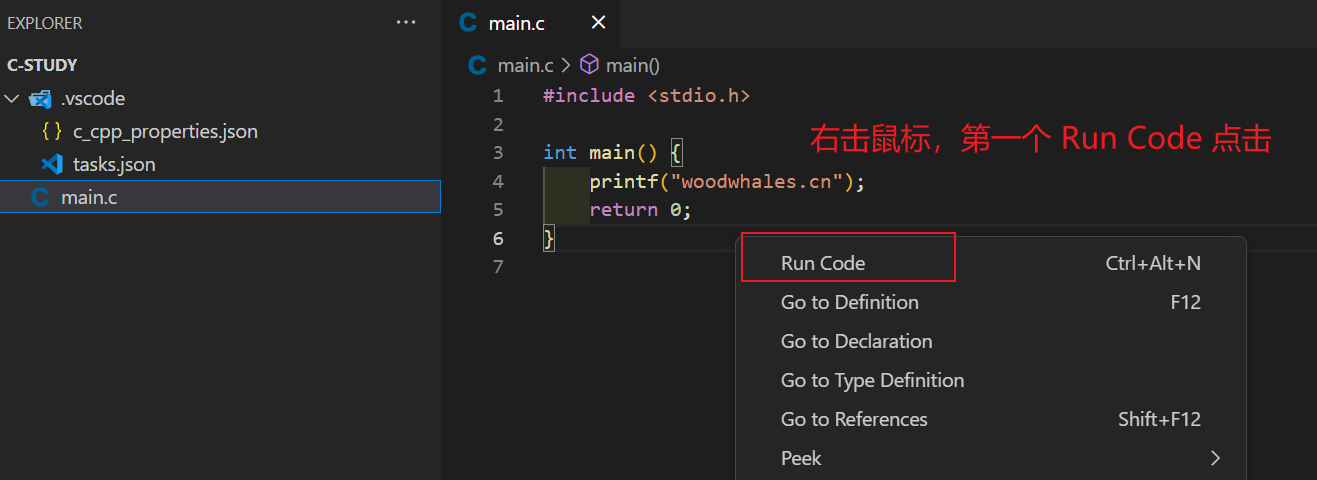
- 方式1:右击鼠标,选择 Run Code 进行程序执行
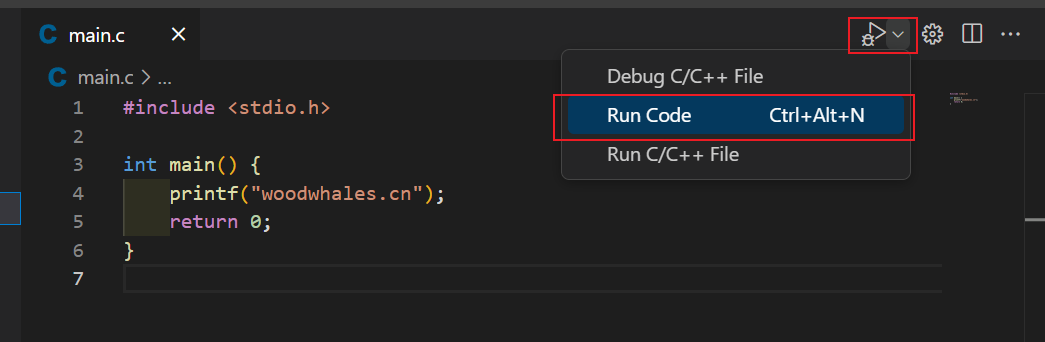
- 方式2:
也可以点击按钮执行:
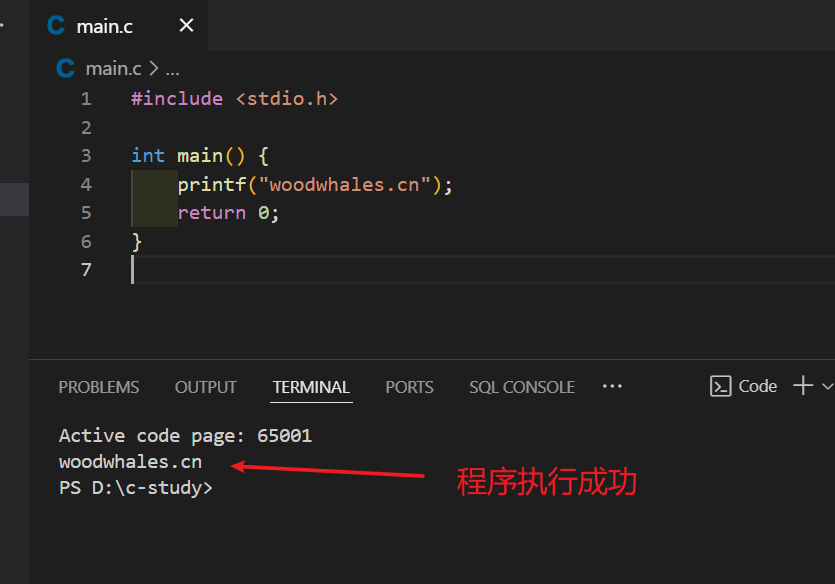
程序执行成功可以在控制台看见输出结果:
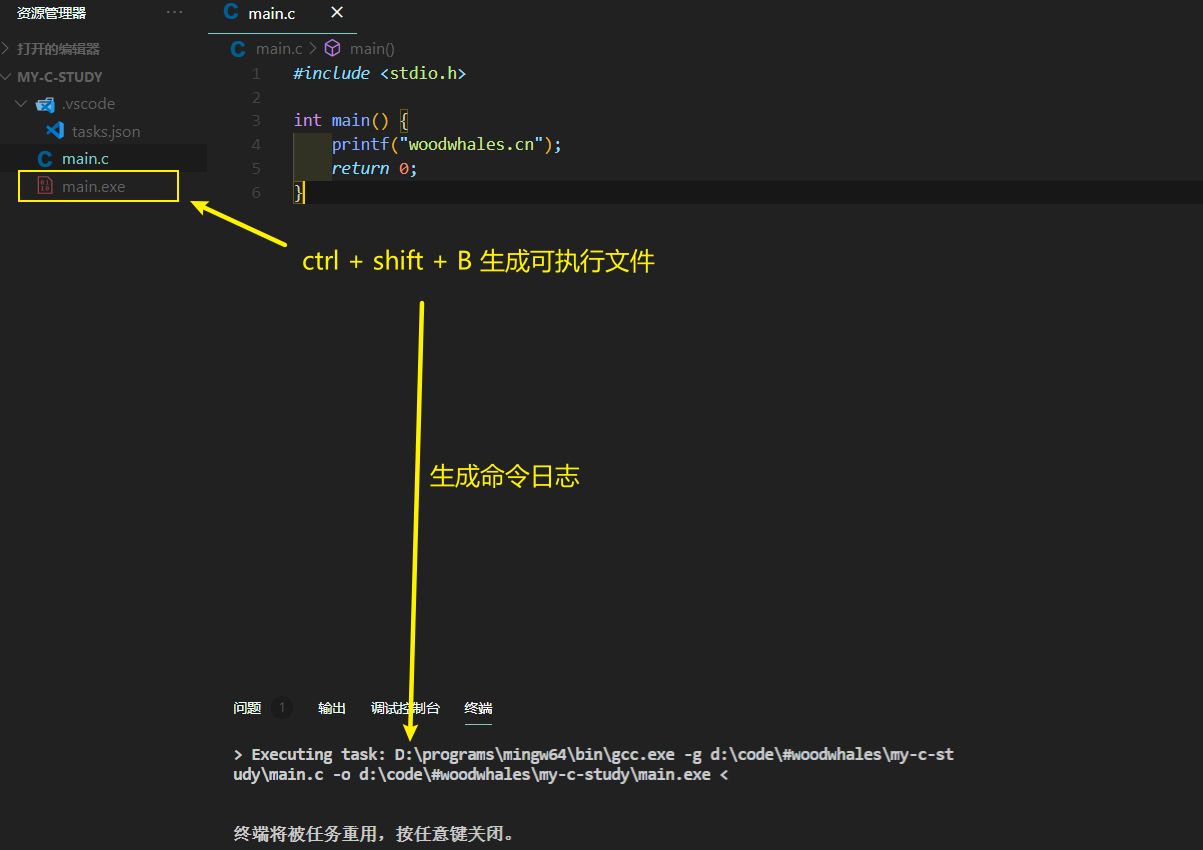
步骤5:生成可执行文件:ctrl + shift + B
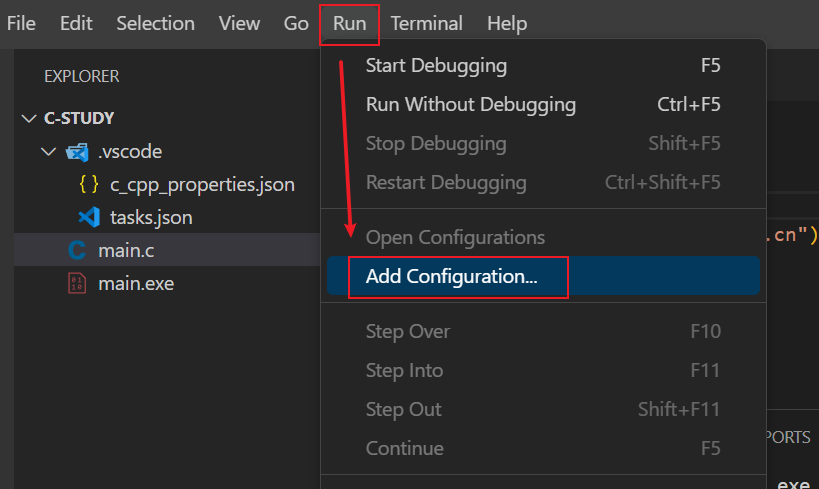
Debug 配置
在Run菜单项中选择Add Configration:
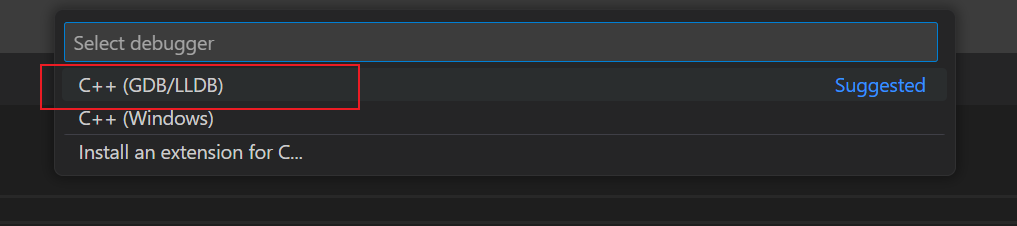
选择C++(GDB/LLDB):
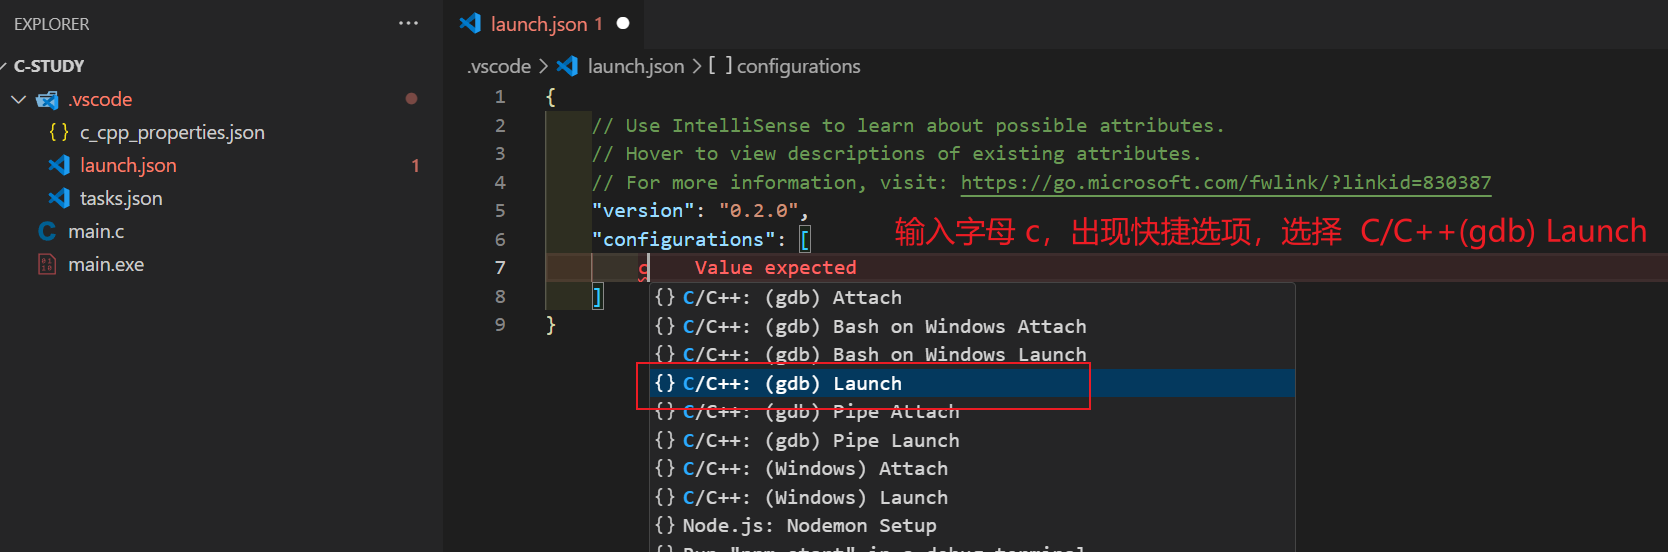
此时,会生成一个launch.json文件,但是它的内容是空的。
此时,再次重复上述操作,在configurations配置项中输入字母 C,在快捷选项中选择:C/C++:(gdb)Launch:
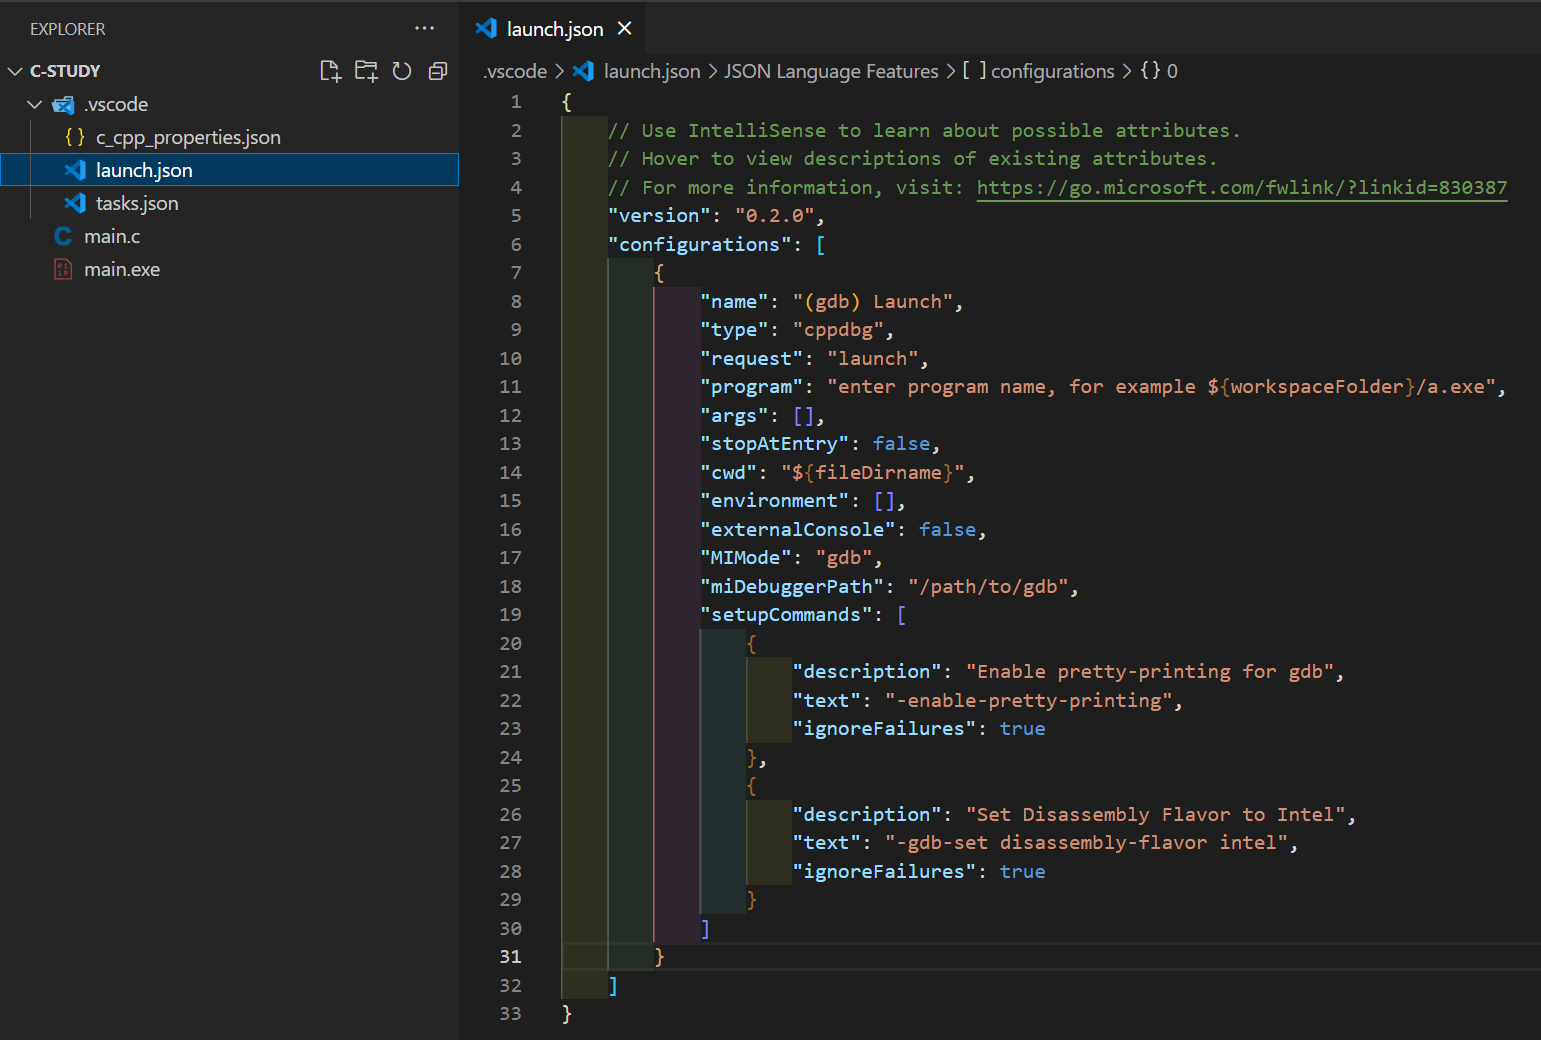
默认配置如下:
修改上述参数配置模板
修改点1
- 文件:launch.json
- 参数项:configurations.name
- 参数值:Debug
- 说明:配置名称
修改点2
- 文件:launch.json
- 参数项:configurations.program
- 参数值:${fileDirname}/${fileBasenameNoExtension}.exe
- 说明:可执行程序路径
修改点3
- 文件:launch.json
- 参数项:configurations.externalConsole
- 参数值:true
- 说明:true 表示从外部终端执行,false表示从 VsCode的集成终端执行,可随自己喜好配置
修改点4
- 文件:launch.json
- 参数项:configurations.miDebuggerPath
- 参数值:C:\programs\mingw64\bin\gdb.exe
- 说明:gdb.exe 文件路径
修改点5
- 文件:launch.json
- 参数项:configurations.preLaunchTask
- 参数值:task_g++
- 说明:这项在默认模板中没有,需要手动添加出来。调试会话开始前要运行的任务,指定任务名称,必须和修改点 6 保持一致
修改点6
- 文件:tasks.json
- 参数项:tasks.label
- 参数值:task_g++
- 说明:和修改点5的参数值保持一致
上述配置修改点如图:

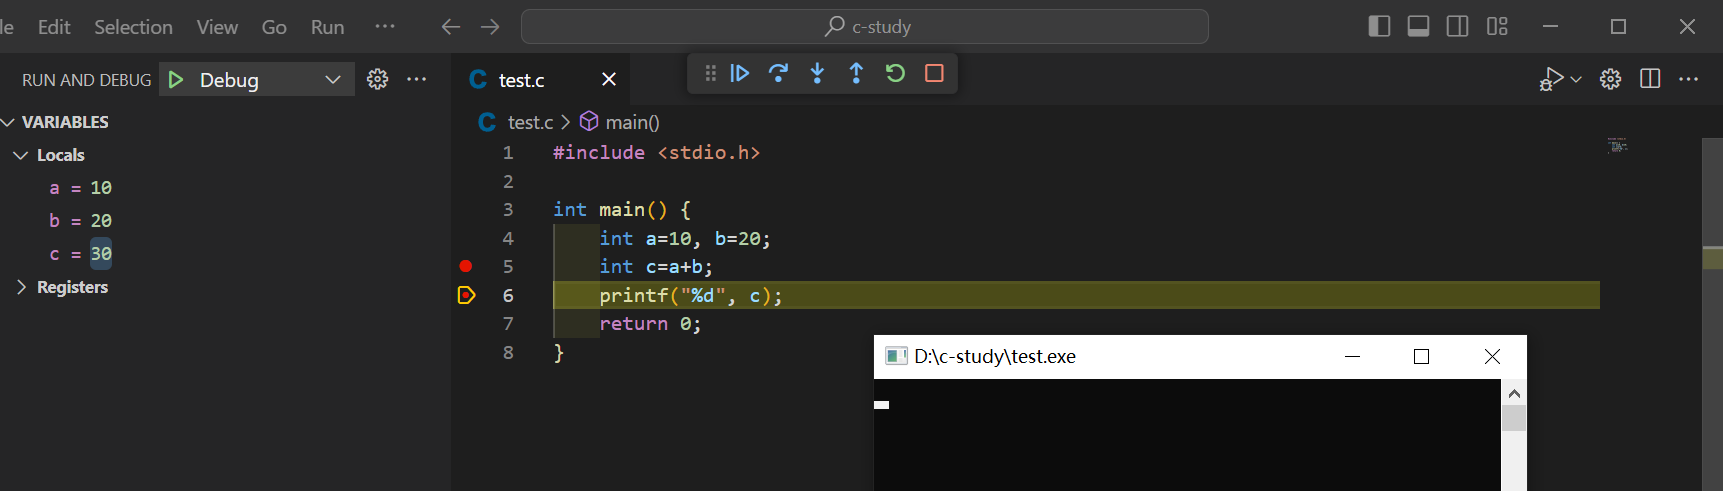
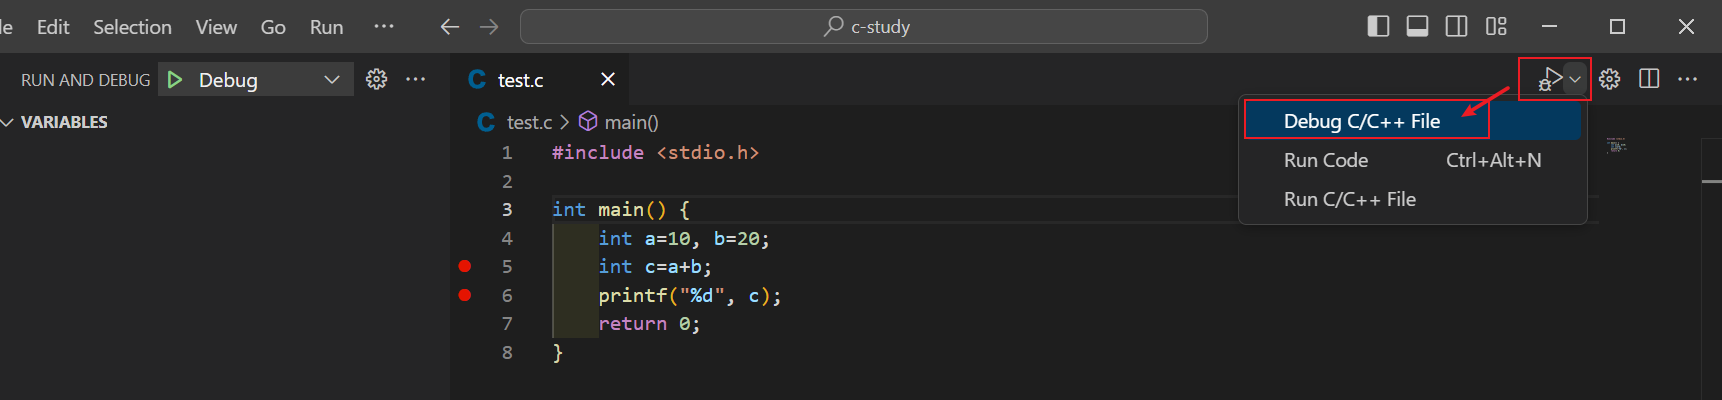
创建测试文件 test.c :
1 |
|
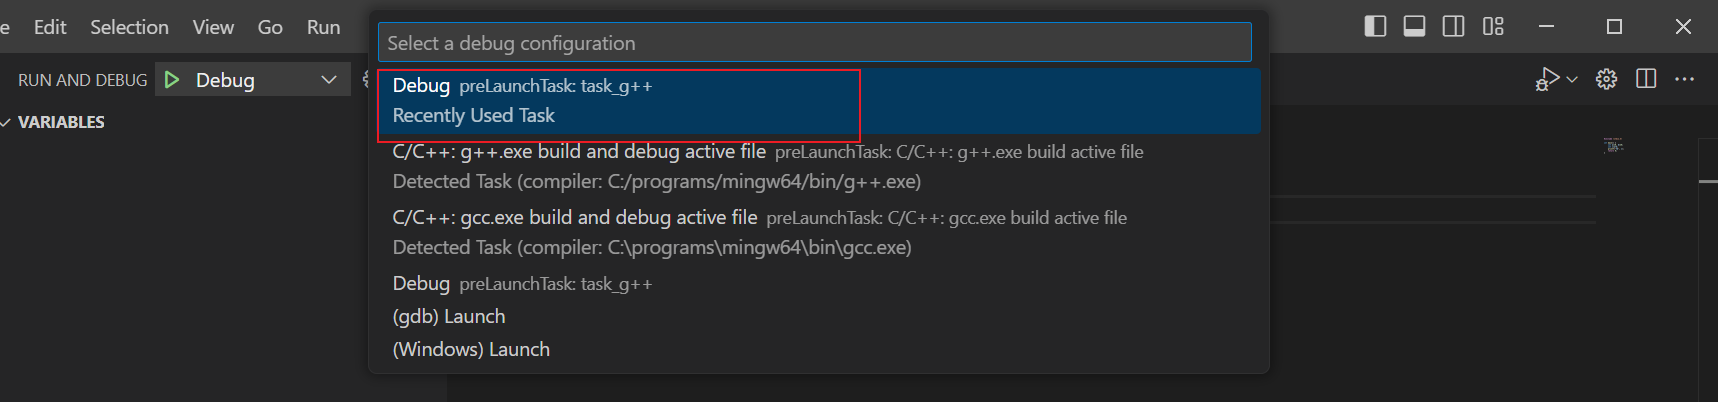
先对需要 debug 的地方打上断点,再按键 F5 或者点击 Debug 图标对程序进行 debug 调试:
debug 调试页面如下: